Tuesday, 22 January 2013

Tasty Green Beans (French Beans)


I find this vegetable plant makes for a lovely plant to grow on a trellis, with its delicate looking small lilac flowers and I can just hear some of friends say that this is the reason I planted it :). Its botanical name is Phaseolus Vulgaris.  They are rich in Vitamin A and C as well as Calcium and Iron.

Actually, it is one of my favourite bean vegetable.  The green beans, known as kacang buncis in Malay, takes approximately 45 days before it will start producing flowers resulting in tasty green beans in about 1 week. However in my latest experiment, it was ready to harvest in 40 days with the modifications I made from the previous experience.  The difference is:

  1. Higher organic content in the soil - 30% of soil mixture is organic matter
  2. Fertilizer used is vermicompost
  3. Pest control and additional fertilisation with the use of E.M.++ spray.


I planted the plants from store-bought seeds which I sowed in organic-rich soil.  After about 3 days, it began to sprout.  In my previous plantings, I transplanted them in big polybags and placed them outdoors by a trellis when it began to produce its trailers.  This time around, I sowed it directly into the trellis bed.  For my experiment, I planted them in my greenhouse, mainly to prevent my chickens from scratching around the plant and so that I can work with it rain or shine.  The greenhouse roof is clear plastic sheets so it allows the sun in as long as the sun is out.  I find it best to water twice a day and it does well in lots of sunlight, which we a graced with here in Malaysia.  During its inital growth stage, I fertilize it once a week and once it starts to flower, I fertilize it fortnightly.  Once a week, I spray it with an organic pest repellent to keep the insects away,  which in this case is my E.M. spray with citronella (serai wangi).  To encourage growth of new shoots and flowering, I remove the old leaves periodically as well as ensure no leaves rot on the vine which may encourage fungus thus infecting the plants.

The soil mixture that is used is a mix of sand, lots of organic matter and soil.  This allows for good drainage and yet able to have a moist and not soggy soil for the plant to thrive in.  At the farm, the trellis is 2m high.  For your home landscape, you can plant it in a planter box or large pot and place it at a balcony or along a fence and you can have a nice plant to look at whilst at the same time able to harvest a good vegetable for lunch or dinner.  You can get that great satisfaction of harvesting and cooking a self-grown, tasty, healthy vegetable.  For future plantings, I am allowing some beans to mature and dry out on the plant so I can harvest the seeds which is almost black in colour with the skin of the bean being light brown in colour.  Now that I have a better methodology, I have sowed more seeds in our trellis beds in the outdoor vegetable section of the farm.

Some of the ways of preparing this is lightly sauteed in olive oil and garlic, often you can find it fried as a tempura, and added into various vegetable dishes.  It's subtle tastes makes it great to be cooked into savoury dishes so go ahead and use your imagination when preparing it and getting all the nutritious benefits from it.

Updated: March 18, 2015

Thursday, 17 January 2013

Long green beans

Like many vegetables, the long green beans ( Malay name: kacang panjang, Botanical name: Vigna unguiculata subsp. sesquipedalis ) can be eaten raw and are deliciously crisp when fresh.  Personally, I like them when they are a darker shade of green with slight visibility of the pods for eating them raw.  They are a good source of protein, vitamin A, thiamin, riboflavin, iron, phosphorus, and potassium, and a very good source for vitamin C, folate, magnesium, and manganeseAs the fruit matures, it turns to a yellowish green to yellow to brown.


I seed them in small polybags (about 10cm diameter) using store-bought seeds. It takes approximately 3 days for the seeds to sprout and once it has sprouted, with the right soil mixture, it grows rather rapidly.  As with most of my vegetables, the soil mixture contains organic matter as well as some sand within the mixture to allow for good drainage as well as moisture control.  After about 7-10 ten days, they are ready to be transplanted.

At the farm, it is transplanted in polybags before placing them along a trellis to allow better utilization of area, effective fertilization, protection from the farm animals and ease of relocating as well as weeding.
The long beans is a climber and is easily trained.  If you plan to plant it at your house, you can plant it along the fence or by an arbor.  It takes approximately 30 days before beginning to flower which then transforms into the long beans.  During this period, the water content in the soil is very important - do not let it dry out as I find that this will reduce the quality and quantity of the beans produced thereafter.  Conversely, do not let it be in a soggy, wet soil as this will encourage rot which can kill the plant.  I let some of the beans to mature to create a new batch of planting seeds.  I fertilize them fortnightly with organic fertilizer.  The mature leaves are also removed periodically to encourage new growth and flowering as well to prevent leaves from rotting on the vine which can encourage fungus which in turn will affect the plant.

The beans are susceptible to black "aphids", which will eat the beans and my best friend in this is the kerangga, the natural predator to these pests resulting in me not having to worry about getting rid of these pest.

The young leaf shoots can also be eaten like many other leafy vegetables - cooking it within a stir-fry dish.As with many vegetables, they are so many ways to prepare it and for me, it is a must in pecal and lontong.  Sometime, I chopped it up along with other ulam and mix it with rice for my version of nasi kerabu.  So, have fun experimenting.

Growing Cabbage

I love cabbage - raw or cooked. I find that this vegetable is very versatile. Cabbages are rich in vitamin A and C. and Calcium. It is also a good source of Thiamin, Iron, Magnesium, Phosphorus and Potassium, and a very good source of Dietary Fiber, Vitamin K, Vitamin B6, Folate and Manganese
Thus I began to experiment planting it from store-bought seeds. I sowed the seeds into 6" polybags in a rich, organic soil mixture. It took about 3 days for it to begin to sprout. According to the seed package label, it should be transplanted in 3 weeks. I did transplant into bigger polybags in about 3 weeks but it was based on the growth of the seedlings - I transplanted them when the width of the plant was the same as the diameter of the polybag.A moist soil is important for its growth with a regular watering, never letting the soil dry out.  I fertilized it every 10 days with organic fertilizer to ensure continuous supply of nutrients.  To keep pests away, I use organic pest deterrents such as serai wangi mix and I check the leaves often to remove any "creepy crawlies".  I find the cabbage plant to be beautiful, like a big, green flower. 

For people with limited space, you can plant them in big planters where it can serve a dual purpose - providing a lovely plant to grace your landscape and at the same time, producing a vegetable for your consumption.  Normally, cabbages are planted in rows of soil beds but at the farm, I plant it in polybags to enable me to better care for them and also to prevent the farm animals from damaging them.  It is imperative to ensure that it receives sufficient water so I water it twice a day once it has been transplanted.

To enable a relatively constant supply of this vegetable, I have sown seeds about 1 month apart so I have plants at various stages.  After transplanting, it takes almost 3 months before they are ready for harvest.  Once the head begins to form, I stop fertilizing and just ensure that the plant receives sufficient supply of water.  I place the plants in my greenhouse to help reduce pests attacks.  The plants does well with lots of sunshine so if you are planting it on a balcony, be sure to allow it to receive around 6 hours of sunlight so a east facing balcony is best - allowing maximum sunglight with less heat.
From my experience, it takes almost 4 months for the cabbage to be ready for harvest so I have to exercise patience but I feel that it is well worth the effort.  Being pesticide-free, I enjoy eating the cabbage raw - as an ulam or salad.  You can also make coleslaw, stir-fry it as a vegetable dish, cooked as with spices and/or chili, pickle it, use it as a wrap for baked dishes, an item in sayur lontong - the options are endless.  So try growing it in a pot and enjoy the fruits of your labor :).
Notes - Lessons learnt:
  1. Soil mixture should be "light" and contain high organic content to ensure a moist growing medium and ease for root growth.
  2. Pest repellent are essential to produce beautiful cabbages.
  3. Fertilization during growth stage before formation of the cabbage head is important to ensure a good size cabbage.
  4. Lots of sunshine.
  5. Never let the soil to dry out - water is critical to good growth.  Insufficient water will result in smaller size cabbage heads.

Monday, 24 December 2012

Kacang Bendi (Okra)

Okra which is also known as lady's fingers or kacang bendi with its botanical name of Abelmoschus esculentus is a vegetable that can be cooked in many ways and is a popular addition in curries locally.

There are two varieties that I plant at the farm: the green okra and the red okra.  The skin of the red okra turns to light green when it is cooked so you wouldn't know that it had red skin.  I planted this plant from seeds and it takes about 3-5 days to germinate.  From seedlings to maturity when it starts to flower takes about 60 days.

A healthy plant grows to look like a shrub with beautiful yellow flowers with a purple center.  The leaves are also a beautiful shape.  At the farm, I have planted this both in the outside ground as well as in a container.  As with many plants, it requires a soil mixture that moistens well as well as provide for good drainage.  I find that a soil mixture which also contains some sand as well as organic matter and low level of clay matter works well. 

Since it can be planted in containers, for home gardeners, you can plant this in large pots and will be a beautiful addition to your home landscape.  Do not let the soil to dry out as it does not do well when the soil is left to dry to days so check the moisture of the soil to water.  I find that it needs at least 8 hours of sun so if you plan to plant it at home, either a landed property or apartment, as long as it gets this amount of sunshine, it can do well,  It also can be planted in direct sunlight - in fact it does best in full sunshine during the day.  The plant can grow up to 2m tall but the height growth can be controlled by pinching off the tip of the plant to encourage it to "bush-out".

Once the flower blooms, it takes about 2-3 days before the "fruit" begins to form.  From then, the bean matures within 3-4 days.  The bean is best eaten when the tip of the fruit is firm and easy to break off.  If the tip just bends or is difficult to break off, this means that the bean will be hard and results in a stringy bean when cooked.  That is why, often, you will see people testing the tip of the bean when they are selecting the bean for purchase.

Okra is a popular health food due to its high fiber, citamin C, and folate  content. Okra is also known for being high in antioxidants. Okra is also a good source of calcium and potassium.

In Malaysia, the beans are cooked in several ways: it can be blanched and eaten with sambal belacan, deep fried with a tempura batter, it can be sliced and cooked with either chillies or soy sauce, stuffed with fish "cake" and cooked in hot water, or in curry or dalca dishes.

Thursday, 20 December 2012

Walking through the farm

 
I am often asked what I have at the farm and it takes a while to describe what the farm is like.  As they say, pictures say 1000 words so this article will take you through some of the "inhabitants" of the farm. 
To start with, since I do spend a lot of time at the farm and sometimes I do not feel like driving home, so it is essential to have some "home" conforts.  The house is still a work in progress - there are still some details to be completed but my priority is the farm operations.

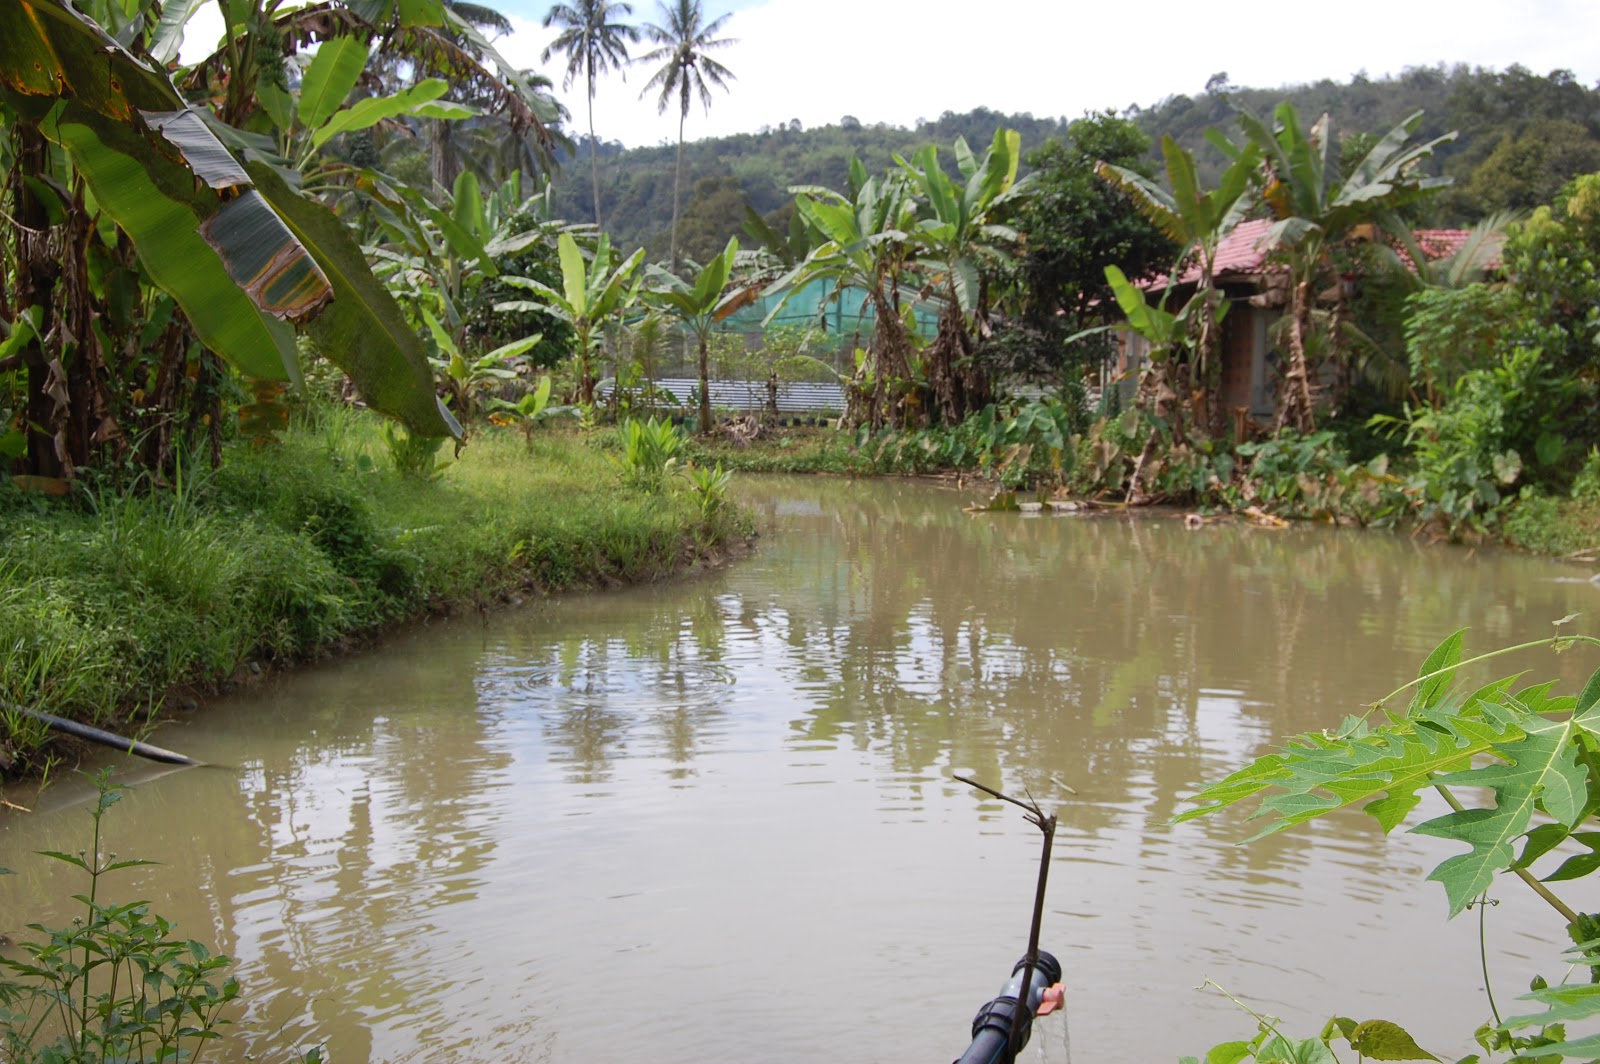
The first category is the water-based element.  I rear red tilapia, lampam and keli within the 24-hours in-flow/out-flow ponds.  Since the water source is from the river at the source, other types of river fish have also entered the pond.

Of course to accompany the water-based "animals", I need to have land-based ones too so I have my kampung chicken.  Some of them are forest chicken descendants so they can fly a distance of about 10-15m.

There are so many types of fruits available in Malaysia but they don't just grow well everywhere.  So we have selected some - taking into consideration the soil type, water and naturally, what the farmer likes :). 

We have about 10 types of bananas at the farm, water apple, rambutan, mangosteen, longan, jackfruit, cenoedak, soursop and many others.  Being in the Hulu Langat area, we also have 1 mature durian and have planted new ones from seeds.

Herbs are part of the Malay tradition and I am often amazed at how good it is for you.  It is my hobby to have a collection of herbs and I am often on the lookout for more to add to my collection.  It also works great as a landscaping addition.  Herbs are versatile - therapeutic, seasoning or condiment, tea, salad - so many ways to use them.


Since I do Sunday morning market, I need produce to sell, amongst them vegetables.  They also flower so it adds color to the farm. 

Some are planted in open air and some are planted in the greenhouse.  Some day, I may add another greenhouse.


There are so many varieties of vegetables, some climb and some crawl :).


So what is in store for the future - I have a few ideas - you will just have to wait and see :)

The Challenge of Growing Tomatoes

When I was living in U.S,, during the summer months I was often able to buy fresh, vine-ripened tomatoes and there were infinitely much better tasting than the regular store-bought ones. I have always found growing tomatoes to be a real challenge, not only from the weather aspects but also insects and bugs seem to love them.  I have tried planting them a few times and from each time, there were lessons learnt.  Due to the weather, I bought some tomato seeds that were labelled to be "tropical-friendly".  I used a high organic soil mixture with some sand content to seed the tomatoes.  Since I wanted to be able to move around my seedlings, I seeded them in polybags.  This also enabled me to keep it weed-free much easier. 

After about 3 days, they began sprouting.  I find that to ensure good root growth and healthy seedlings, it was important to ensure moist and not soggy soil condition.  A key item to remember, good root growth is essential as it is the point of entry for the nutrients that the plant needs.  So, if your plant has poor root growth, this will limit its ability to absorb the nutrients from you fertilizers.  When it was about 6"tall or approximately 10 cm, I transplanted into large polybags.  As the plant grew, more roots grew from the bottom level of the stem so I periodically added additional soil mixture to cover it which is 50% soil and 50% organic compost.  In order to accomodate this, when I transplanted them into larger polybags, I did not plant the seedling high but at about mid-level, allowing me the room to add additional soil in the future.

The tomato plants require support or else the plant will fall over as it does have a "soft" plant stem.  My plan is to retain these plants in a polybag throughout its cycle so whatever mechanism that I use had to continue to enable me to weed easily as well as move it when necessary.  I settled for creating "tube" fences from 2"x2" metal fence material.  These tube fences can be re-used when this set of plants die so I felt it was a good investment - both of time and money.

As my cats love to keep me company as I work in my greenhouse, this also help to keep the plants  from being sat-on or knocked-over.  As the plants grow, I would help the plant along by assisting the branches to ease their way through the slots, keeping it balanced.  After about 2 months, I had to add a stake to provide additional support as well as weave string along the stems as the weight of the tomatoes weighed the stem causing it to "fold" down, reducing the nutrients necessary to the growth on the stem.

To keep the pests away, I use a serai wangi mixture to act as a pest repellent, spraying one a week on the whole plant.  The plants are watered daily, in the morning mainly to prevent the formation of moss on the soil and also to ensure that it has sufficient water to prevent the plant from wilting.  After approximately 8 weeks, the plants began to flower at the upper part of the plant, producing several yellow flowers per stem.

Within 1 week, the flower had fully bloomed and dried out followed by the formation of the "baby" fruits.  The average height where the fruits began to form was 1m so I was glad that my tubes were high enough to be able to provide the necessary support for the fruits.  You can see the changes on the growth of the fruits daily and every morning that I am at the farm, this is the first plant that I check.  I fertilize the plants about every week, using organic fertilizer, which will further decompose within the soil providing the necessary nutrients to the plant.  I find the timing of the application of organic fertilizer is different from chemical fertilizers which dissolves in water immediately.  I check the root exposure level of the plant regularly and top up the soil as necessary.  It is important to keep the soil moist but not soggy or the stem of the plant will rot at the base, killing the plant.

I decided to experiment - I have some plants in the greenhouse and some outside.  I find that they grow as well outside as inside and that as long as I kept the pests aways, it was fine.  I placed the outside plants with a east facing so that it received lots of sunshine in the morning but shaded from the late afternoon side.  As I had planted it in polybags, it was essential to watch the moisture content of the soil - if it dries out, the quality of the fruit will drop.  I continue to spray it with an organic pest repellent weekly and it is now on a fortnightly fertilization schedule.  The pest will attack the plant stem, leaves as well as the fruit so it is important to watch out for them.  At the farm, the main pests are aphids, ants and caterpillars.

It took about 2 weeks for the tomato to ripen to a nice red-vermillion color from when it formed.  The average time from seeding to actually being able to taste the first fruit was 10 weeks. 
Nutritionally, it is a great source of vitamin A, C and K as well as Manganese and Potassium.  It is also very low on Sodium.  It is a good source for Vitamin E and Bs.  Being chemical pesticide free, I just needed to rinse of any dust and dive into it.  One thing I can say, it definitely tastes infinitely better being fresh off the vine :).  Personally, I prefer to have this raw: in a tossed salad, chopped up and mix with cilantro, olive oil and salt or blended as a cold "soup" - either of these ways preserves the nutritional value of the tomatoes best.
Now that this batch is producing fruits, it is time to start seeding the next batch.  The work continues......

Tuesday, 4 December 2012

Being A Small Farmer Part 5 - Growing Vegetables

In line with having an integrated farm, one of the key items is vegetables.  I selected the vegetables based on what I like.  Inherently, if you select what you like, then you would tend to pay more attention and I do believe this is true.  I have taken the route of planting most of my vegetables in polybags for two main reasons: (1) ease of weeds control and (2) to ensure that the vegetables get the fertilizer and not washed away or consumed by weeds.  The starting place is my greenhouse, where all the seeds get sown which is then transplanted and placed either within the greenhouse or outside.  What did I select?

To start with, I selected long green beans.  This is a versatile vegetable - you can eat it raw or cooked.  So naturally, going natural removes the worry of those pesky chemicals.  I started with sowing the seeds, in the greenhouse, which sprouted in about 3 days.  After allowing it to grow to about 10cm, I transplanted them into a polybag and placed them outside under its trellis.  The lesson I learnt from the first time that I planted this was that the chickens love to scratch around the plant, often uprooting it hence I didn't get much yield from it.  This time around, there are in polybags with the "tube" fence to prevent them from getting to the plant on sitting on it.  This plant is a climber so having a trellis structure is key to its growth.  The soil mixture that I use has a high organic content to it.  I sprinkle organic fertilizer fortnightly in circle with a radius of  about 6cm from the base of the plant.  I am fortunate that the farm is located in an area where there is good rainfall and since it was placed outside, I haven't had to water it, leaving the rain to provide the water.
 
It took about 40 days before it started to flower.  The flower and shoots are susceptible to a pesky black insect similar to aphids which will cause it to be destroyed.  My ally in this is the kerengga, those biting red insects.  Normally, I would try to get rid of them as they tend to bite you but in this instance, I allow them to roam freely thereby keeping the pests at bay.  The only problem is they like to make their "houses" with the larger leaves and to discourage them, I remove the leaves that they use to make their houses.  This serves a dual purpose - it enables me to control the population of the kerengga as well as well as encouraging new shoots.  I often snack on the green beans as I am doing maintenance the plants - picking them and munching on it without worrying about washing it.  The yield this time is also much better than my first attempt and we did manage to have some for sale at the Sunday morning market and it was gone very fast.

Another favorite vegetable of mine is the cabbage and it too can be eaten raw or cooked.  With the cabbage, one must be patient as it does take a lot longer compared to other vegetables before harvest.  However, I think it is well worth the wait.  It took about 5 days before it started to sprout and took about 3 weeks to grow to about 6 cm.  At this size, with at least four leaves, I transplanted them into polybags.  As with all my vegetables, the soil mixture has a high organic content to it.

I monitor the soil moisture and water it once or twice a day depending on the weather with pure uncontaminated river water.  I am still waiting for my cabbage to mature and be ready for harvest.  According to the seed label, it takes 75-80 days from transplanting, which means it will take about 96 - 101 days before harvest.  As the plant grows wide, It seems to be growing well and it is now about 40 days from transplant.  I do enjoy looking at the plant as it looks like a beatuiful big green flower.  This vegetable will remain in the greenhouse until it is ready to enable me to manage its pest control.  Those insects and caterpillars love munching on them and I find that with weekly serai wangi and water mixture spray, it keeps those pests away.  I am looking forward to eating it and I am not sure if any will make it to the Sunday morning market.  I guess I will have to plant lots more :).